Tuesday, July 3, 2012

Mojito Steaks


Mojito Marinated Steak with Pico de Gallo


One of the best things about the summer is using the outdoor grill and having minimal clean up! Another great thing about the summer is lazy evenings spent with friends sipping light and refreshing grown-up beverages. Putting them together in one dish beats both options in my opinion which is why we tried out this genius recipe for a Mojito grilled steak!

Mojitos are a scintillating combination of rum, mint, and lime juice. (If you haven’t figured it out yet, I’m a huge fan of lime juice. It’s a shame that too much acid from citrus causes cankersores and strips the enamel from your teeth otherwise I’d have lime juice with everything!) When we mix these flavors together, we get a drink that just screams “RELAX WITH ME!” Mostly because the rum makes us loose and lazy.

Why not marinate your steak in this happy marriage of flavors? Marinating not only makes the meat more flavorful, but also brings out the tenderness. You got to try a little tenderness! Especially when you’re grilling – it’s very easy to dry out your food on the grill so marinating serves a double purpose.

I found this recipe in a Cooking Light Fresh Food Fast Weeknight Meals publication a couple years ago and finally got around to testing it out. You can find it online here.

I like my steak medium rare - cook yours to desired doneness!


My only suggestion is to marinate for an extended amount of time so more of the marinade can sink in to give this dish more POW! Since it’s supposed to be something you can whip together fast after work, they only allow for 30 minutes of soaking in that yummy mojito bath they call a marinade. I trimmed my steaks and got them in the marinade around two in the afternoon so by the time we were ready to prepare dinner all we had to do was get the grill ready then take the steaks out after they had bathed for a few hours. It was worth it.

I confess that I did not serve pico de gallo with the steaks as the recipe calls for. I had made an avocado salsa earlier in the day that I will share with you in a later post. (It’s amazing!)

To save on calories, we sipped on No-jitos with our Mojito Steak. Thank you Crystal Lite for making low calorie grown-up beverage inspired drink packets!

Friday, June 22, 2012

Oreo Cream Pie


Renée’s Oreo Cream Pie


Hello again, dear readers! Please allow me to apologize for the extended absence. Unfortunately, things happen in life that may cause us to lose any desire to do what we love to do. Through the gentle urgings of friends and loved ones, I have finally made it back into the kitchen to do some of my own cooking. Thank you to everyone who has helped me get back to this point – you know who you are and I consider myself blessed to have you in my life.

Now that the sentimental part is over, let me return to entertaining you with my celebration of all things Oreo. You may remember that I have a Romeo and Juliet style love affair with Oreos. We are definitely starcrossed lovers considering I am trying to lose weight and Oreos really don’t aid in that endeavor. However, we all deserve to treat ourselves from time to time since otherwise our junk food cravings would increase exponentially.

Summer has finally arrived and it brought temperatures in the high 90s and humidity to match. That means no indoor cooking and definitely no baking. I am NOT turning on the oven in a house with no air conditioning. While ice cream is delectable and oh so enticing during the summer months, there are other treats worth savoring…such as NO-BAKE desserts.

You may be familiar with the Jell-O No-Bake Oreo pie which is pretty good but…meh it’s just so BOXED. What could I do to make it better than boxed? Apart from not using it. My birthday passed recently and my mother was going to try and make a homemade version of The Cheesecake Factory’s Italian Cream Pie – which they no longer sell. (I’m incredibly sad that they don’t.) In any case, between two layers of vanilla cake is a thick layer of lemon mascarpone…mmmmmmmm! Due to scheduling conflicts, I didn’t get a birthday cake. I did get a birthday cupcake and a cheesecake so no worries.

So we have this mascarpone in the fridge. If you aren’t familiar with it, mascarpone is a sweet Italian cream cheese. It’s relatively expensive since it’s usually imported. I have yet to see a domestic mascarpone. It is one of the most deliciously decadent cream cheeses I have ever had with a slightly vanilla taste to it reminiscent of a very lightly sweetened whipped cream but much thicker.

I decided to make an Oreo something with it. (Can you really expect anything less?)

My Oreo Cream Pie


Oreo pie crust – just buy it at the store and save yourself some time and energy.
Double-stuf Oreos – you’ll be needing 20
8oz mascarpone
8oz Cool-Whip
¼ cup sugar
Mini Oreos for garnish

*If you can’t find mascarpone or if you don’t want to shell out the money for it you can substitute cream cheese just be sure to add a teaspoon of vanilla extract to the filling mixture. If it’s a little tangy, consider adding more sugar but do it slowly and taste as you go. You don’t want it to be sickeningly sweet.

Instructions


Get out your Oreos. 10 of them need to be crushed into pieces. The other 10 need to have that wonderful STUF in the middle removed. You’re going to put the STUF in the filling mixture. Scrape the STUF into a bowl and then reserve the cookie halves.

In the same bowl as the STUF, whip the mascarpone and sugar together until there are no more lumps. Add the Cool-Whip and stir by hand if you used a mixer previously. At this point add your CRUSHED Oreos and combine.

Once you’re satisfied with your filling, take out your Oreo crust and fill with the mixture. At this point, I took the cookie halves and crushed them into a fine powder (I put them in a bag and  then took the meat mallet to them) and then dusted the top of the pie.

I assure you it will be tough to resist but do not eat right away. Put the pie in the fridge and let it set. The Oreo pieces are going to soften and come close to a velvety texture. It’s simply incredible.

You can serve this with mini Oreos as a garnish because they’re just so cute. :) Technically, I shouldn’t eat dairy but I make an exception for Oreos because for whatever reason, they’re so much better with some kind of milk product.


Saturday, May 5, 2012

5 Margaritas for Cinco de Mayo


Cinco Margaritas por Cinco de Mayo! If you have been a faithful food follower here on The Taming of the Roux, then you may remember that Mexican is one of my favorite types of cuisine. Mm Mm Yuuuumy! And if you know anything about my education for the past several years, then you may know that I took 10 long years of Spanish. Can I speak it fluently? Absolutely not. But Cinco de Mayo is here and I thought, what a great day for a special edition post here on my blog!

At first I was going to share a recipe I’ve been working on after being inspired by a mediocre dish at Chili’s. But I still need to work out the kinks so you’ll have to wait with baited breath and an empty stomach for that surprise!

Then this cute idea came to mind: 5 different margaritas for Cinco de Mayo! Don’t worry, I didn’t drink these alone and certainly not in one sitting. I spread this out over several days and had company.

What you need:
Silver tequila (or blanco, they’re the same thing). Get a good bottle of it. I cannot stress this enough. Good tequila makes good margaritas. Cheap tequila tastes really cheap. Now I’m not telling you to go out and buy top shelf tequila. Something in the middle will work for mixing margaritas. While Sauza tequila and Camarena are not sippers they make very good margaritas. They run for about $20.00 which is a whole lot more affordable than Patron.

Salt or Sugar

LOTS OF LIMES – I must have used 20 limes while preparing for this blog entry. You can use sweetened lime juice or bottled lime juice as well.

You’ll notice that I garnished all my margaritas with lime. That’s how I like it but feel free to be creative!

Several of my cooking magazines were devoted to tacos and margaritas for this month’s editions and I decided to give them a whirl. Five very tasty whirls!

1 Margarita – Cooking Light’s Blackberry Margarita


We enjoyed the flavor of this one but we didn’t follow all of the instructions. This recipe calls for straining the blended blackberry mixture through a fine sieve lined with cheesecloth…I didn’t have cheesecloth at hand. The recipe said that straining was optional but next time we would definitely strain it so those pesky seeds aren’t in the way. (And aren’t stuck in our teeth.) This is a refreshing and sweet margarita. You can line it with salt like I did or you can use sugar if you prefer to sweeten your sips even more.

2 Margarita – Bon Appetit’s Triple Sec-free Agave Margarita 


Bon Appetit magazine boasted that we wouldn’t miss the usual addition of triple sec or orange flavored liqueur. Instead of using the triple sec, they called for light agave syrup (nectar). This can be found in your health foods or organic section of the grocery store. Its consistency is slightly more viscous than honey and can be used on pancakes instead of maple syrup if you’re looking to find other uses for it apart from this delicious margarita! We most certainly did not miss the triple sec! This recipe is light and refreshing, really allowing the tequila to shine through. It’s so incredibly simple you might wonder if it will be any good at first. But once you taste it, I think you’ll love it too. Make sure you use white tequila and of course you should like the taste of tequila if you decide to make this one. If not, try one of the fruity recipes I made this week! :) 

3 Margarita – Jumpin’ Margarita 


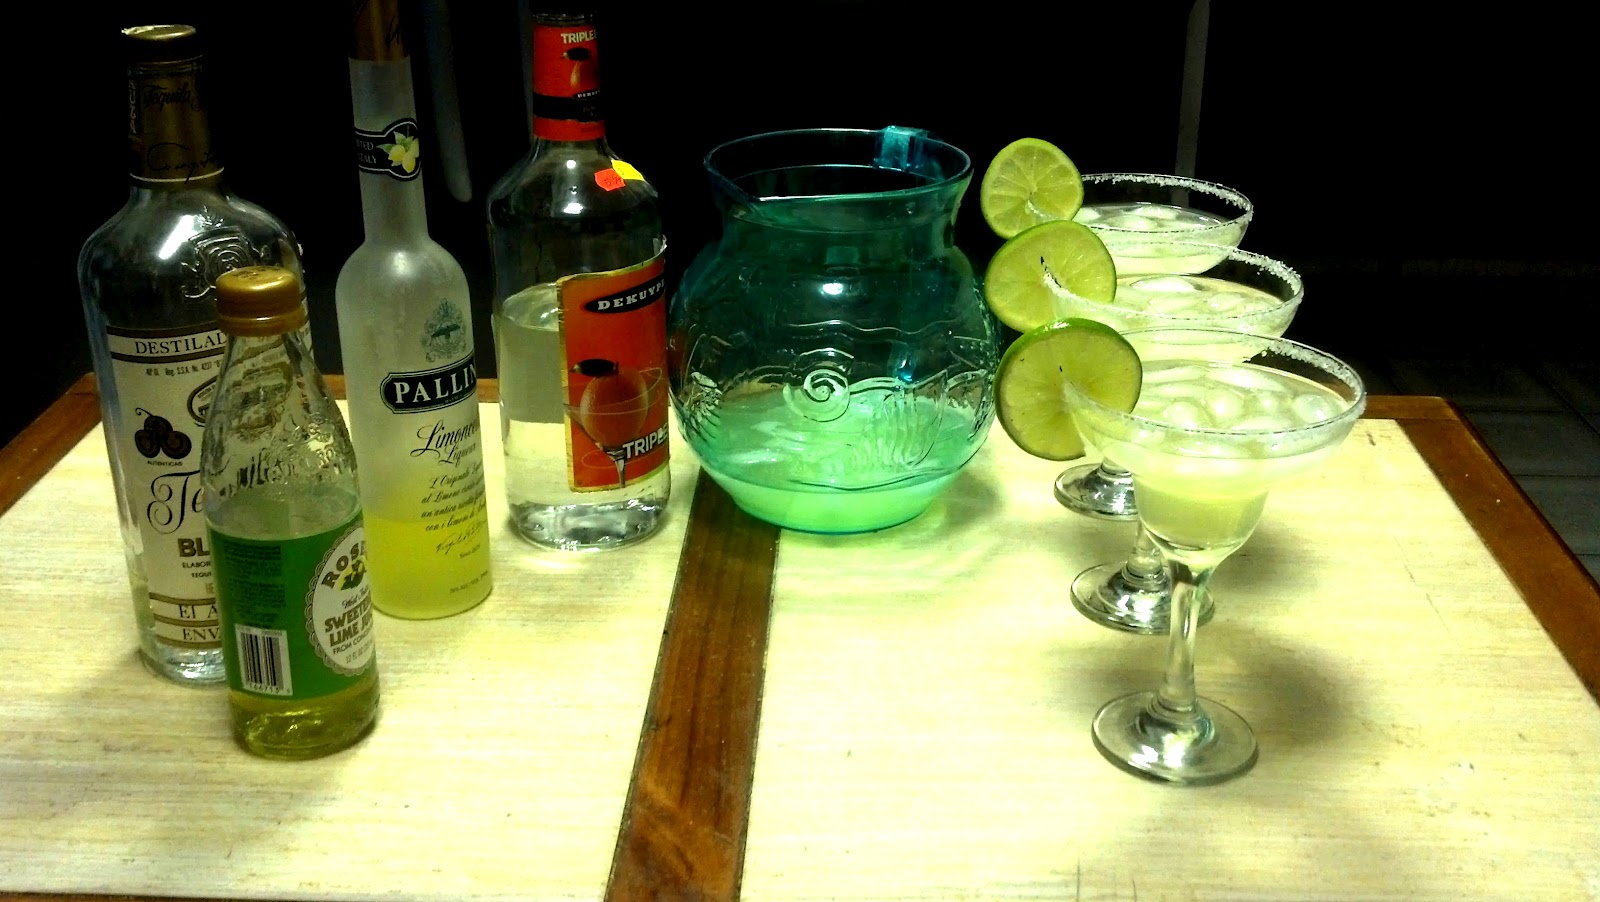
I pick up inexpensive cookbooks whenever I can…including ones exclusively for cocktails. I have aspirations of being a bartender. It won’t happen. This margarita happens to come from one of them and it happened to call for lemonade and margarita mix and sweetened lime juice…things I don’t usually reach for when making margaritas since I prefer to keep it simple and fresh. That doesn’t mean we don’t keep those things around the house just in case! We even made the addition of a splash of limoncello. This margarita is perfect for those of you who need to cover the taste of alcohol a little to make it palatable. But hey, I don’t discriminate! Without any self-control, I probably would have finished the pitcher off by myself.

Just Cocktails recipe for “Jumping Margaritas”
Serves 1
Slice of lime
Salt
1½ oz tequila
1 oz triple sec
1½ oz margarita mix
½ oz lime juice
            3 oz lemonade
            Extra slice of lime for garnish

Rub margarita glass rim with lime slice and frost with salt. Mix the next 5 ingredients in shaker filled with ice; shake well. Strain cocktail into glass. Garnish with a slice of lime.

4 Margarita – Food Network Magazine’s “Perfect Margaritas” 


This month’s edition of Food Network Magazine promised to reveal the secrets of a “perfect” margarita so we tried it of course. Very simple, this mixture calls for your traditional ingredients of silver tequila, orange liqueur, lime juice and then the addition of fine sugar. This was by far the tartest recipe we tried this week. If you like you margaritas without any frills then this is the one for you. Make sure you really mix your sugar in until it dissolves. Perhaps making or using simple syrup would have been a better way to combine the ingredients for this one.
           

5 Margarita – Cranberry Margarita


There’s this great Mexican restaurant a couple towns over from me that makes awesome (and inexpensive) margaritas! My favorite is what they call a “Rosarita” which has cranberry juice in it hence the name. (Rosado is pink in Spanish and the color of this drink matches). I decided to try and make my own version of it.
           
Renée’s Rosarita Margarita
                        Makes 3-4
                        1 cup silver tequila
                        ¼ cup triple sec
                        ¼ cup cranberry juice
                        ½ cup lime juice (fresh or sweetened depending on what you prefer)
           
Mix it all up and chill or serve immediately over ice. (Regardless of whether or not its chilled, serve over ice. Unless you prefer to make frozen margaritas. My mother always taught me to drink my margaritas on the rocks but to each his or HER own.)


Because the world looks better through salt-rimmed glasses!
Have a great Cinco de Mayo!
-Renée

Thursday, May 3, 2012

Lemon Chambord Bundt Cake


Inspiration struck when my half Greek friend and I were laughing and quoting My Big Fat Greek Wedding. (Awesome movie. If you haven’t seen it then you need to fix that ASAP.) I’m a movie quoter to the Nth degree and the people I work with think it’s hilarious how many quotes I can pull out of my head at the perfect moment. If you’re familiar with the movie, then you must remember the scene with the Bundt cake. If not, watch this clip:


Later on in the scene, they bring the Bundt out with a vase in the center of it and someone shouts “You fixed it!” I decided to recreate it and bring it to work. Part of our celebration for finishing college. (YES!)

My version :) Pardon the background.


Now this cake is delightful and so elegant! It tastes so good and the best part…it’s from Cooking Light. (DOUBLE YES!) If you have flavored liqueurs around your house, you might be wondering what to use them for. Cooking is my favorite way to use them and baking closely follows. Chambord is a raspberry flavored liqueur but it’s pricey so we didn’t have any around the house but I really wanted to make this cake. We ended up finding another brand, Chateau Monet, that was nearly half the cost of the Chambord so we went with that one instead. If you aren’t willing to shell out money for a full bottle of an expensive flavored liqueur, I suggest checking out the nips section.

Lemon Pound Cake with Chambord Glaze

Click the link above the picture for the recipe.


This wasn’t my first foray into the flavor combination of lemon and raspberry having made my mother Lemon Raspberry cupcakes for her birthday. We enjoyed those so much, I figured we would love this cake as well. I was not disappointed. I made this for the first time on Sunday night and it was so delicious that I had to make it again for the blog and for my family. Rachel was very upset that I didn’t have any for her when I came home Monday night.

Some criticisms: I got this from the magazine a few years ago and the online version of it has a little more information about the glaze than the magazine issue. I felt like the glaze was VERY thin. In the pictures they have taken of it, the glaze looks a lot thicker. They also instruct you to pour the glaze on the cake while it is still warm. My first attempt resulted in a glaze runoff that pooled around the sides of the cake on the plate and then subsequently onto the table. Once it dried, the glaze reminded me of a donut glaze which I didn’t think was too thrilling.

Some mishaps: I was trying to watch Once Upon a Time while making this on Sunday night. (Are you surprised?) So I missed the instruction to grease your pan AND dust it with sugar! I certainly greased my pan using a baking nonstick spray but I completely missed the part about the sugar. This helps prevent the cake from sticking and also helps the cake “climb” the sides of the pan. I wasn’t too worried until my cake wouldn’t come out of the pan. (A baker’s worst nightmare.) After a doing a little dance and making a little love to the cake (just sweet talking), the cake finally slid out but a gasp of horror still escaped my lips when a portion of my cake’s top was left behind in the pan!! I managed to get the top out without inflicting too much damage and I put it back together like the cake puzzle it had become.

Next time: I’m going to make a few alterations to the finished cake concerning the glaze and topping. So for now we’re going to put this recipe in the “testing” phase. I’ll repost when I’m 100% happy with it! As is, it’s a delicious cake! Ask anyone who ate it!


Thursday, April 26, 2012

Korean Tacos


Tacos are awesome. They are one of those great foods that are totally open to interpretation and experimentation. Like burgers, it is so much fun to try them in new and interesting ways with different toppings and flavors. And I love different flavor combinations! It is particularly enjoyable when it’s a flavor that you aren’t expecting from a certain dish.

When I say to my sister, “we’re having tacos this week” she makes this face. It’s the face of every child who isn’t thrilled about what mom put on their plate or packed them for lunch... only she’s 18. For some reason, she has a problem with traditional smoky seasoned ground beef tacos. (But she loves ordering a Crunchwrap Supreme at Taco Bell – literally Rachel, it’s the same thing in a different shape with more carbs. Once I made the closest thing to a Crunchwrap Supreme that I can at home just to get her to eat regular taco meat. I love you, Rach but C’MON!)

What she really does love though, are tacos with fruity salsas on top and a couple excellent fish taco recipes I have saved from Cooking Light. I’ll get around to sharing those someday, don’t worry. But this time we tried something that took the taco out of the realm of Mexican and into the Korean kingdom. (I like alliteration). :D Most excellent.

I found this recipe in an issue of Eating Well. I’m constantly searching for magazine recipes and then saving them in binders so we have lots of options for meal planning. This one was for Korean Steak and Mushroom Tacos with Kimchi. You can find the magazine recipe here. I made a few minor adjustments which included making my own fast kimchi since my grocery store doesn’t sell it prepared.

Kimchi is like a Korean version of sauerkraut or coleslaw. It is very versatile and can be eaten as a side dish or as a topping for various sandwiches. Caution: you will have to enjoy a zing in the back of your throat because while it’s certainly cool from being chilled, the heat of the spices is sure to turn you into a fire-breathing dragon. (I happen to like that.) After looking up various recipes, and realizing that most called for allowing the kimchi to sit in the fridge for days, I pulled together the basics to create my own quick and easy kimchi with what I already had at hand.

Renée’s Kimchi

4 cups thinly sliced cabbage (Savoy or Napa – I used what we had on hand).
½ cup chopped scallions
2 tbsps rice wine vinegar
1 heaping tbsp Sriracha
2 cloves garlic, minced
1 tbsp fish sauce
1 tbsp low sodium soy sauce
Salt and pepper

Mix everything together in a bowl, cover and refrigerate for at least 5 hours. This will keep in your fridge for up to 2 weeks.


Korean Steak and Mushroom Tacos with Kimchi  

2 tablespoons reduced-sodium soy sauce
1 tablespoon toasted sesame oil
1 tablespoon packed light brown sugar
1 tablespoon mirin or Sake with a small amount of sugar added
1 tablespoon Korean chile paste
2 cloves garlic, minced

12 ounces skirt steak, trimmed and cut into 3 pieces (I used strip steak because our butcher doesn’t have skirt steak)
8 ounces shiitake mushrooms, stemmed

1 cup prepared kimchi, drained and chopped
1 cup shredded carrot
2 scallions, chopped
8 corn tortillas, warmed

I have divided the ingredients list into sections to make it easier to process the instructions. The first section is for the sauce which I honestly suggest doubling. I felt like there wasn’t enough sauce for all of the steak and mushrooms so I just drizzled it over the finished tacos to use less of it. You may prefer to do it this way rather than mixing the steak and mushrooms into the sauce to coat.

Preheat grill to medium-high.
   
Mix all the ingredients from the first section in a small saucepan. Bring to a simmer (small bubbles every few seconds) over medium heat and cook until slightly thickened for about 3 minutes, stirring constantly. Remove from heat, set aside, and cover to keep warm.
   
Grill steak 1½ - 3 minutes per side for medium if you used skirt steak. If you’re like me and can’t find skirt steak, adjust your cooking time to be slightly longer. You can also use flank steak for this recipe (we don’t because my father finds it too chewy, what a baby). Transfer to a clean cutting board and let rest for 5 minutes. Grill mushroom caps until soft and charred around the edges, 1 to 2 minutes per side. Thinly slice the steak across the grain. Slice the mushrooms. Add the steak and mushrooms to the sauce and stir to combine OR drizzle sauce over tacos once put together.
   
To assemble tacos, warm or toast your tortillas then divide the steak and mushrooms among them. Top with kimchi, carrot and scallions.

The sauce is really what MAKES this dish. Its sweet but its spicy too and the soy sauce gives it that umami punch. I really loved the sauce. Next time I make this, I’m definitely doubling the sauce, maybe tripling…or quadrupling. It’s just that delicious. :) 


Thursday, April 19, 2012

Of Life and Lemons


Life has been giving me lots of lemons this past week. Despite having Monday off and spending it with people I love eating burgers and ice cream then failing miserably at mini golf as per usual, my first day back to the grind wasn’t pleasant. My attire was for a much sunnier disposition but so many things went wrong during my geology lab (which involved math) and then one issue after the next at work, and car problems combined with sheer exhaustion made for one awful day. If only the evening could have been better, instead I didn’t get enough work done and fell asleep while studying for my quiz. Wednesday wasn’t much of an improvement apart from a wonderful exiting interview with my favorite professor who made me feel like a million when he said I have been a delightful student. :)

Initially I intended today’s blog update to be entirely different but considering all the lemons in my life, I decided to make something with them. Two somethings, actually. This week we have Lemon-Thyme Pasta Salad and Strawberry Lemonade!

Lemon-Thyme Pasta Salad

Please excuse the container, this is my lunch for tomorrow.

Originally, I made this recipe as a chicken salad but we happened to have some leftover penne from the previous night’s dinner. Quick decision: pasta salad instead of chicken salad. Incredibly simple and hey! it’s vegetarian too!

Ingredients:
Leftover pasta (obviously not spaghetti or linguine or stuffed pastas with the exception of tortellini – this would actually be delicious with tortellini)
Mayo
Fresh thyme or dried thyme
Lemon
Salt and pepper

You may have noticed there are no measurements. This is the kind of recipe that really depends on how much pasta you actually have and its very basic so you shouldn’t need measurements. Kind of like making tuna fish sandwiches, no one measures for that! You just know what the right amount for you is without the comfort of precise measuring tools.

Directions:

Pour pasta into a bowl, warm it up in the microwave very slightly if it’s cold, just enough so that it separates easily. Then plop, drop, dollop, or whatever your mayo onto the pasta and stir to coat. I like just enough to coat my pasta but not overwhelm it.

Squeeze lemon juice over the mixture, I used half a lemon for about 2 cups of pasta. You could use the zest as well, I clearly wasn’t thinking when I made this so I didn’t use it, but the zest would be awesome!

Add your salt and pepper to taste then add your thyme. I used fresh thyme and I really enjoy it so I used about 3 teaspoons worth. Then stir to combine and allow to sit overnight so those flavors marry.
The flavor profile of this pasta salad is very delicate and refined. It doesn’t have any vinegar so it doesn’t wallop you with that kick and note of sourness. (Which I quite enjoy in pasta salad but this is a nice change). I’ll share the original chicken salad recipe someday with you guys. :)

Strawberry Lemonade


I initially made this as an alcoholic punch/sangria! I didn’t want to be drinking alone today, so I nixed the wine I usually put in this. Best thing about it? It’s sweet and tart and if you so wish it can be fizzy too. What’s better than bubbles? They certainly help put me in a better mood…without the help of alcohol.


Ingredients:
Fresh strawberries (crucial!)
Your favorite lemonade
1 lemon (cut into slices)

Optional Sparkling lemon water (not seltzer! Poland Springs has a line of sparkling waters with flavor)
Optional Moscato

Directions:
In a blender, combine about 16 strawberries with tops cut off and your favorite lemonade. Today I used Simply Lemonade but in the past I have used Crystal Light. Hit puree! (Or just the lowest level, puree is kind of taking it to an extreme).  

After it’s blended, you can strain it if you so wish but I like the strawberry pieces in mine. Pour into a pitcher with the lemon slices and keep chilled in your refrigerator or pour into glasses and serve immediate or just drink it straight from the pitcher with an extra-long straw. Whatever makes you happy!

If you want the fizz, fill your glass halfway with the lemon water and top off with the strawberry lemonade.

If you want the alcohol, pour desired amount into your pitcher and stir. I love it this way since that’s what I did the first time and it really did make everything better ;) I know my friends loved this when I made it for them so I think there is a pretty good chance that you will love it too!

Thursday, April 12, 2012

Blonde Brownies AKA Blondies


Even though my friends in the office will probably curse me for tempting them with baked goods AGAIN, blog day has arrived and I didn’t have time to shop. I asked myself what could I possibly make with what I already had at hand? If you’re anything like me, you may have Easter candy from that sweet-loving bunny lying around! I happen to have, not one, but TWO chocolate bunnies. Poor wabbits…they’re going into my blonde brownies!


Since I’m still not comfortable with coming up with baking recipes, I settled for adapting Toll-House’s Blonde Brownie recipe by swapping the semisweet chocolate chips for my chocolate bunnies.

You’ll be needing:

2 ¼ c. all-purpose flour
1 ½ tsp. baking powder
1 tsp. salt
1 ¾ c. packed brown sugar
1 ½ sticks of butter, softened
1 tsp. vanilla extract
3 eggs
2 cups semisweet chocolate chips OR 2 Lindt Chocolate Bunnies broken into small pieces

Preheat your oven to 350 and get a medium bowl and a large mixing bowl. In the medium bowl, combine your flour, baking powder, and salt. In the large mixing bowl, beat your butter, brown sugar, and vanilla. Once they are completely combined (the brown sugar should look slightly darker) add your eggs one at a time.

After adding the eggs, slowly add your dry ingredients. I did this in four parts, mixing in between then add your chocolate pieces mixing until just combined.

The original recipe calls for a 15 X 10 jellyroll pan but…I don’t like thin brownies! I baked them in a 13X9 inch pan instead and I highly recommend this swap. Spread the batter evenly on the pan (this is probably the hardest part since the consistency is more like cookie dough than a chocolate brownie batter). Bake for 30 to 33 minutes. Allow to cool and then feast!

It’s a lot like a really thick and chewy chocolate chip cookie. Delicious! Especially when warm and gooey. If I had vanilla ice cream, I would certainly have put it on top. Mmmmmmmmmmm!